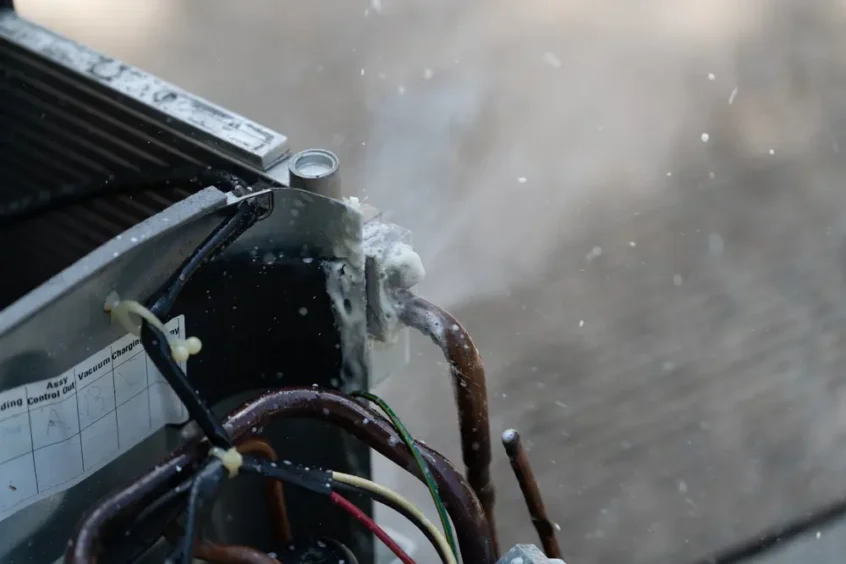
Wondering why your AC unit is freezing up in the hottest months of the year? You might ask yourself, “How is it that it’s 90 degrees outside and my AC unit has frost buildup?” This issue actually happens to be a very common problem and can lead to further HVAC complications.
So, why is your AC unit freezing up? And, what can you do to prevent this from happening? It’s important to understand the causes and preventive measures to tackle this common air conditioning issue.
What Causes an AC Unit to Freeze Up?
Low AC Refrigerant
Your AC unit requires a certain amount of refrigerant to guarantee the best cooling performance. When the refrigerant falls under the required amount, the balance will be thrown off and lead to your air conditioner freezing.
If you spot frozen coils, this is a common sign your air conditioner has low refrigerant levels. Contact a professional technician to restore your air conditioner’s refrigerant levels and mitigate the possibility of future AC problems.
Dirty Air Filters
One of the most common factors that leads to your AC freezing up is a dirty air filter. Your air conditioner’s air filter can become dirty due to debris buildup and dirt accumulation. This will then lead to a lack of airflow into your AC system and cause it to overwork itself, resulting in a freeze. Monitor your air filters and change them regularly to avoid a frozen AC unit.
Broken or Clogged Coils
A broken or clogged evaporator coil can also lead to a frozen AC unit. Evaporator coils may become clogged due to dirt and dust buildup or they can become corroded over time and break and lack efficiency. These issues compound and lead to unusual temperatures, leading to ice buildup.
Blocked Air Vents
A blocked air vent is caused by the same debris and dirt buildup seen with dirty air filters. The same cause leads to the result, a frozen AC unit. Check your air vents regularly and clean and vacuum them when necessary.
Damaged Blower Motor
The blower motor in your air conditioning system plays a key role in keeping your home cool. If the blower motor becomes damaged or fails altogether, this can cause your AC unit to freeze and cease working. Hearing a rattling sound while it’s trying to operate indicates something is wrong with it. Issues with a blower motor are a more complex issue and an HVAC technician should be consulted if the blower motor is the culprit.
Clogged Condensate Drain Line
Your AC’s condensate drain line is responsible for removing water created in the cooling system and disposing it away from your home. The condensate drain line can become clogged due to dirt, mold, or debris and the created excess moisture can flow into your AC unit and home, possibly causing issues to both. And ultimately, freeze your air conditioning coils.
How to Stop Your Air Conditioner From Freezing Up
Now that the causes of this problem have been established, what are the ways to prevent a frozen AC unit? Use these tips as an added layer of protection against freeze buildup.
1. Check Refrigerant Levels
Have an HVAC technician inspect your refrigerant levels to determine if your AC unit needs or is sufficient for the time being.
2. Replace Your Air Filter
You should practice regularly checking your AC’s air filters. Inspect the air conditioner’s air filters for debris or dirt buildup and clean or replace them every one to two months. This will improve your air conditioner’s performance and the quality of air. Replacing a dirty or clogged air filter can lower your air conditioner’s energy consumption by 5% to 15%.
3. Inspect the AC Drain Line
It’s important to check your AC drain line throughout the summer, but using a dry/wet shop vacuum to remove debris and other buildup will help you prevent a frozen AC unit. You can also turn to an HVAC specialist to help with this preventive measure.
4. Keep Vents Open
Keeping your vents open and free of blockages is one of the easiest ways to prevent a frozen AC unit. Avoid closing more than two or three vents at any given time.
5. Contact an HVAC Technician to Inspect Your Fan
Your blower motor’s fan is a vital piece of equipment to help generate airflow. This is often difficult to do on your own, so contact an HVAC technician to inspect your fan. Keeping the blower motor’s fan in working order is an important step to prevent a frozen AC unit.
Serving Carmel, Fishers, Lawrence, and Nearby Cities with Reliable Air Conditioning Services
A frozen AC unit at your home can stem from a variety of causes, but thankfully, there’s a great list of preventative measures to help you start preventing it from happening. If your options have run out and you’re stuck with a frozen AC unit in the Indianapolis, Indiana, area, Chapman Heating, Air Conditioning, Plumbing & Electrical is ready to help.
Chapman Heating, Air Conditioning, Plumbing & Electrical provides reliable and efficient air conditioning services for homes in Indianapolis, Carmel, Fishers, Lawrence, and other surrounding areas. Chapman’s HVAC technicians are there to keep your household cool all summer long.
At some point in a homeowner’s journey, residents will come across the common aggravation that is low water pressure. This leads to the pertinent question “Why is my water pressure low?” There is a multitude of reasons for low water pressure, and knowing those reasons and the common background behind water pressure will alleviate homeowner stress.
Symptoms of Low Water Pressure
You’ll know when water pressure in your house isn’t right. Around Circle City, Hoosiers often notice the problem first thing in the morning or when more than one faucet is running. Here are some of the most common signs:
- Faucets that only drip or trickle instead of a steady stream
- Showers that feel weak and take forever to rinse soap or shampoo
- Appliances like dishwashers and washing machines that run longer than normal
- Toilets that take too long to refill after flushing
- Water flow that drops sharply when two or more fixtures are in use
If you’ve noticed these issues in your Greater Indy area home, it’s a good idea to dig into the cause before the problem gets worse.
What Is a Normal Water Pressure Level?
A normal water pressure for your house ranges from 45 to 80 psi. Anything below that level constitutes low water pressure. If you are feeling wary that your water pressure is low, use a test gauge that measures psi. This handy tool can be found at most hardware stores. To measure your home’s water pressure, screw the gauge onto the hose spigot on the outside of the home. Turn the valve on, and your reading will appear.
7 Causes of Low Water Pressure
1. Water Demand
A common cause for low water pressure can be due to high water demand within the household. When multiple taps are used throughout the house, this can drop the water pressure below a satisfactory level. Between the multiple taps being used throughout the home, the demand becomes too high, leading to low water pressure.
This can easily be fixed by making sure the use of water throughout the house is divided properly by staggering activities that rely on water consumption. Examples would be avoiding showers when running the dishwasher and making sure multiple sinks aren’t being used at the same time.
2. Closed Shut-Off Valves
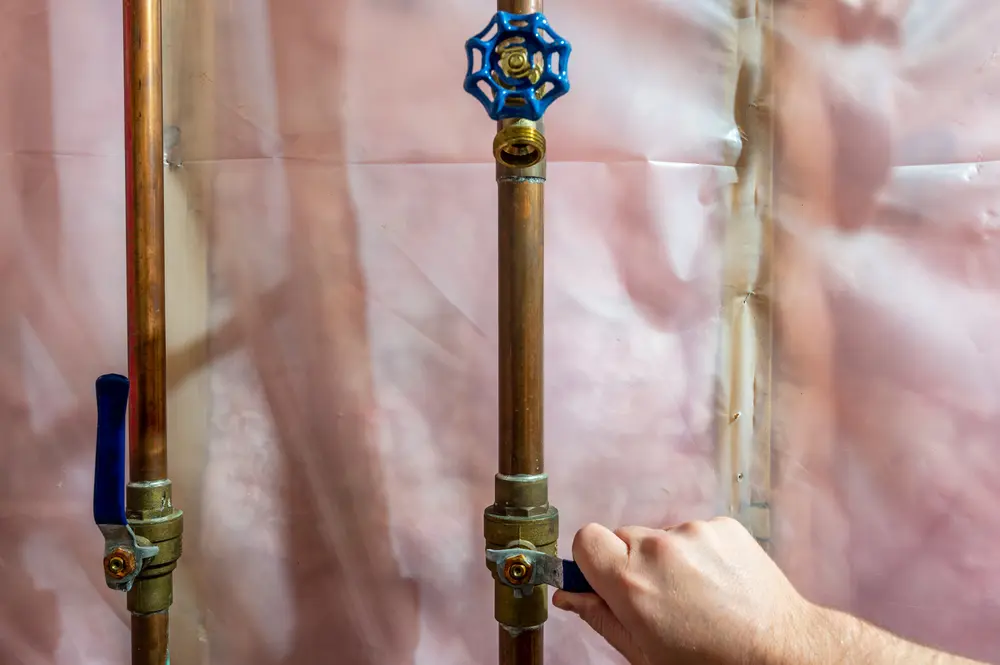
The main water shutoff valve regulates the flow of water in a home. If your water pressure is low, it may be because this valve is partially closed. For your home to receive proper water pressure, it’s essential that these valves are open.
The main shutoff valve can be located near the outside hose spigot or inside the home in the utility room. Make sure the valve is turned all the way to the opened position. Harsh winters in Indiana can lead to issues for not only your shutoff valve but also other plumbing fixtures in a home. Chapman Heating, Air Conditioning, Plumbing & Electrical can assess the situation, determine the issue, and offer a long-lasting solution.
3. Plumbing Fixture Issues
Another issue that may cause low water pressure is fixture issues. One thing to keep in mind is the aerator on a faucet fixture. The aerator is designed to reduce an influx of water flow from the faucet without compromising water pressure. Aerators can be prone to buildup by limestone, rust, or dirt. This can be fixed by removing the aerators on your faucets and inspecting them for these issues. Reinstall the aerators once they have been cleaned to determine if the water pressure is now at a good level.
Fixtures themselves can also get clogged, and given that they are relatively inexpensive, replacing them is a viable option.
4. Broken Pressure Regulator
The plumbing system within your home contains a component known as the pressure regulator. This regulator keeps water pressure at a comfortable level in your home. Your water pressure may become low or high depending on if this component is broken.
The pressure regulator is a bell-shaped component near your home’s hose connection. You can adjust the pressure regulator accordingly depending on your home’s water pressure issues, whether high or low. High water pressure in particular can cause other problems like damaged faucets, showerheads, appliances, and water lines. Call a plumber if you believe your pressure regulator needs replacing.
5. Sediment Buildup
Sediment buildup within a pipe’s walls can lead to clogged pipes over time. Minerals flowing through running water can create buildup that will ultimately induce low water pressure. A common sign of this issue is initially observing good water flow that dwindles to mere drops.
Routine checkups by your plumber will help determine the current health of your pipes to curve the chance of sediment buildup being the root cause of your water pressure problems.
6. Corrosion
Corrosion issues pertain to homeowners with metal pipes. Corrosion develops over time within metal pipes and will restrict water flow. Corroded pipes may affect a small section of pipes within a home or the whole plumbing system.
Calling a plumber will help determine whether your pipes need cleaning or if they need to be replaced. Chapman Heating, Air Conditioning, Plumbing & Electrical can offer full pipe repair or replacement in the Indianapolis area.
7. Small Branch Lines
The vertical supply stack lines that come off the plumbing system are known as branch lines. These branch lines lead to different plumbing fixtures. Low water pressure can also mean that your branch lines are too small to satisfy your home’s water demand. The fix to this issue would be best suited for your plumber to gauge if your home needs bigger branches.
Quick DIY Fixes
If low water pressure strikes your home, it can be a daunting task of what to do. Thankfully, there is a list of quick do-it-yourself fixes anyone can do before restoring to a local plumber.
Check Your Shower Heads
A simple solution to low water pressure issues can be checking your shower heads. Your shower head may have developed too much buildup. If different faucets and taps throughout your home have different water pressure levels, this is the best place to start.
Soaking your shower heads with vinegar and then cleaning them regularly afterward can help clear up depository buildup.
Drain Your Water Heater
Water heaters can also develop sediment buildup. Homeowners should regularly practice draining their water heater once a year. If this isn’t practiced, this can take years off of your water heater’s lifespan. Turn off the water heater first, then drain the tank.
Clear Debris From Pipes
Miscellaneous debris can cause your pipes to get clogged. As mentioned above, clogged pipes can cause low water pressure. A cable or snake drain that’s fed down your pipes can do a great job of unclogging your pipes. Doing this task regularly is a healthy way to help the timespan and efficiency of your home’s pipes.

Fix Low Water Pressure with the Expert Plumbers at Chapman
If these DIY tasks haven’t fixed your water pressure issues, it’s probably time to contact a local professional. Low water pressure can be caused by a degree of issues. Indianapolis area residents can have faith in the certified professionals at Chapman Heating, Air Conditioning, Plumbing & Electrical for their plumbing needs that range from routine inspections, pipe replacements, cleaning, repair, and more to fix low water pressure in your home. Schedule an appointment with Chapman Heating, Air Conditioning, Plumbing & Electrical today.
A foul odor coming from your sink drain is an unpleasant and perplexing problem. The unpleasant scent may linger in your kitchen or bathroom, making everyday tasks uncomfortable and leaving you wondering, “Why does my sink drain smell?”
From food particles and grease buildup to bacterial growth and plumbing issues, there are various reasons why your sink drain might emit a foul smell. Let’s take a few minutes to delve into the common culprits behind this problem and explore possible solutions to eliminate the odor and restore freshness.
5 Reasons for a Smelly Sink Drain
Mold and Mildew
The damp, dark environment of sink drains provides the perfect breeding ground for mold and mildew. These fungi thrive in moist conditions and can produce a musty odor. Regular cleaning and proper ventilation help prevent mold and mildew growth, eliminating the source of the unpleasant smell.
Clogged Sewer Line
A clogged sewer line can cause sewage backups, leading to foul odors that travel out of your sink drain. This issue often requires professional intervention to diagnose and resolve, as it may indicate a more significant problem within your plumbing system. Prompt attention to clogged sewer lines can prevent further damage and eliminate unpleasant odors.

Rotting Food
Food particles that accumulate in sink drains can decompose over time, resulting in a foul smell. Rotting food debris can also attract bacteria and other microorganisms, which only exacerbates the odor problem. Regularly clearing food scraps from your sink and using drain covers can help prevent this issue and keep your sink smelling fresh.
Venting Issues
Proper venting is essential for maintaining optimal airflow in your plumbing system and preventing foul odors from entering your home. Venting issues, such as blocked or improperly installed vents, can lead to sewer gas buildup in sink drains, resulting in unpleasant smells. Professional inspection and repairs of venting problems are necessary to ensure proper ventilation and eliminate odors.
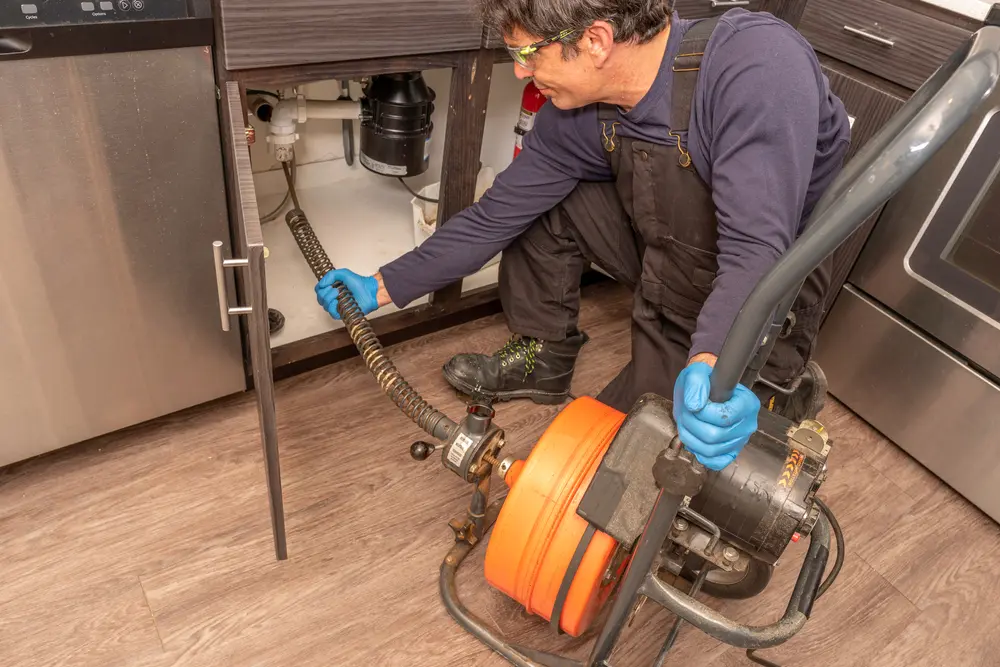
Clogged Drain
A clogged drain can trap debris and organic matter, leading to bacterial growth and foul odors. Hair, soap scum, and other materials can accumulate in sink drains over time, causing blockages and odor problems. Regular drain cleaning and garbage disposal maintenance can help prevent clogs and keep your sink smelling fresh and clean.
Dry P-Trap
The P-trap, a curved section of pipe beneath the sink, traps water and prevents sewer gases from entering your home. If the P-trap becomes dry or loses its seal, sewer odors can permeate your sink drain. Running water regularly and ensuring proper P-trap maintenance can help maintain the seal and prevent unpleasant odors from escaping.
Tips to Get Rid of a Smelly Drain
To get rid of a smelly drain, try following these tips:
- Boiling Water: Pouring boiling water down the drain can help dissolve and flush away grease, food particles, and other debris that cause unpleasant odors.
- Baking Soda and Vinegar: Create a natural cleaning solution by mixing baking soda and vinegar. Pour the mixture down the drain, let it fizz for a few minutes, then flush with hot water so it can work its magic. This combination helps break down buildup and neutralize odors.
- Citrus Rinds: Toss citrus fruit rinds, such as lemon or orange peels, into the garbage disposal and run cold water. The citrus oils will help freshen the drain, leaving a much more pleasant scent behind.
- Ice Cubes and Salt: Drop a few ice cubes down the drain followed by a handful of coarse salt. Turn on the garbage disposal, and let it grind the ice and salt mixture. The abrasive salt dislodges buildup and debris while the ice helps clean the blades.
By incorporating these simple yet effective methods into your cleaning routine, you can banish foul odors from your drain and enjoy a fresh-smelling sink once again.
Get Your Home Smelling Fresh Again With Chapman
Eliminating an unpleasant drain smell from your home is essential for creating a clean and inviting environment for family and friends. With Chapman's range of effective odor-elimination products and solutions, you can enjoy a fresh-smelling home every day.
Whether you're addressing a bad smell coming from your sinks or tackling plumbing issues, drain cleaning, or sewer cleaning, Chapman has you covered with reliable odor-fighting solutions. Say goodbye to unpleasant odors and hello to a revitalized home with Chapman. Schedule a service today to get one step closer to a fresher space.
If you've ever experienced your dishwasher backing up into your sink, you know how frustrating and messy it is. This common household issue can stem from something as simple as a clog to more serious plumbing issues.
Let’s take a look at common reasons why your dishwasher might be backing up into your sink along with practical steps to address the problem. Whether it's a minor blockage or a more complex plumbing issue, understanding the causes and knowing what to do next can help you resolve the issue swiftly.
Why Your Dishwasher Might Be Backing up Into Your Sink
Several factors may contribute to this problem, ranging from minor clogs to more serious plumbing issues. Understanding the underlying causes of this issue can help you tackle the issue effectively. Here's a brief overview of possible reasons why your dishwasher is backing up into your sink.
Clogged Sink
Experiencing a clogged sink is not only an inconvenience but can also lead to your dishwasher backing up into the sink. Several factors contribute to sink blockages, ranging from food debris and grease buildup to plumbing issues.
A clogged sink impedes proper drainage, causing water from the dishwasher to back up into the sink.
Obstructed Dishwasher Drain
Is your dishwasher overflowing with water and causing a leak? It could be due to an obstructed drain that causes water to back up into your sink. Culprits like food scraps, grease, or even forgotten utensils can form a blockage in your dishwasher drain.
When the dishwasher drain gets clogged, water backs up into the sink, turning your kitchen into a wet mess.

Jammed Garbage Disposal
If your garbage disposal is jammed or malfunctioning, it can disrupt the drainage flow, leading to water backing up into the sink. Dishwashers often share drainage connections with garbage disposals, making them more susceptible to the consequences of disposal issues.
A backed-up sink is just the tip of the iceberg; a jammed disposal can exacerbate the situation, causing water to overflow into the sink and beyond.
Blocked Air Gap
The issue might be a blocked air gap. A blocked or improperly installed air gap can disrupt drainage flow, leading to water backing up into the sink. Dishwashers rely on air gaps to prevent backflow, making them vulnerable to issues when the air gap is blocked.
When the air gap is blocked, water from the dishwasher seeks refuge in the sink, turning your kitchen into a splash zone.
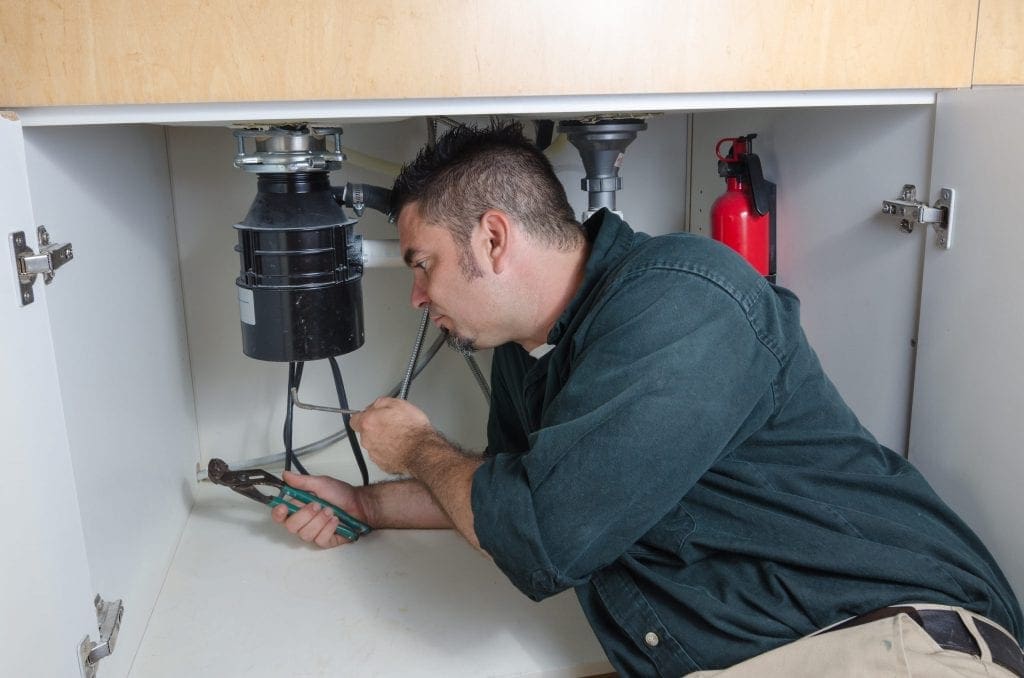
Expert Solutions for Clogged Sinks and Dishwasher Backups with Chapman
Looking for reliable plumbing solutions in Indianapolis or a surrounding area? Look no further than Chapman Plumbing. With a team of experienced professionals, Chapman offers a range of expert plumbing services to address all your needs.
Whether it's fixing a clogged sink, resolving dishwasher backups, or tackling more complex plumbing issues, Chapman has you covered. Our plumbers are dedicated to providing top-notch service and ensuring customer satisfaction every step of the way. Schedule an appointment with Chapman today!
Fix Your Clogged Sink or Dishwasher Backup Today!
Resetting your gas or electric furnace is a simple task that can often resolve common issues such as a malfunctioning thermostat or a tripped circuit breaker. Whether you have a gas or electric furnace, knowing how to reset it can save you time and money on unnecessary service calls.
Keep reading to learn how to safely reset your furnace to keep your home comfortable when it’s cold outside.
What Is a Furnace Reset Button?
The furnace reset button is a crucial safety feature within your home's HVAC system, allowing for rapid shutdown in case of overheating or malfunction. When triggered, it cuts power to the furnace to prevent potential hazards. However, frequent tripping of this button signals an underlying issue such as overheating.
Why You Might Need to Restart Your Furnace
During the colder months, maintaining a functional furnace is crucial for indoor comfort. In certain situations, such as when the furnace becomes overheated, a reset may be necessary to ensure proper operation. This action halts the furnace and allows for a safe restart, preventing potential issues like a tripped circuit breaker. Here are some reasons why you might need to reset the furnace:
- Fuel Depletion: Running out of fuel can cause the reset button to trip. Check the fuel tank and refill if empty before attempting a reset.
- Closed Gas Valve: A closed gas valve connection can impede furnace operation. You may be able to remedy this problem by opening the valve manually.
- Flame Sensor Problems: Malfunctioning flame sensors can trigger a reset. In such cases, we advise contacting Chapman for a prompt inspection and efficient repairs.
Where Is the Reset Button on a Furnace?
It’s typically colored red or yellow for easy identification and is commonly found inside the blower compartment. The reset button on a furnace serves as a vital safety feature. Remember that it’s normal for furnaces to require occasional resetting, especially in response to overheating. If the furnace frequently requires resetting, you should have it inspected to address any underlying issues.
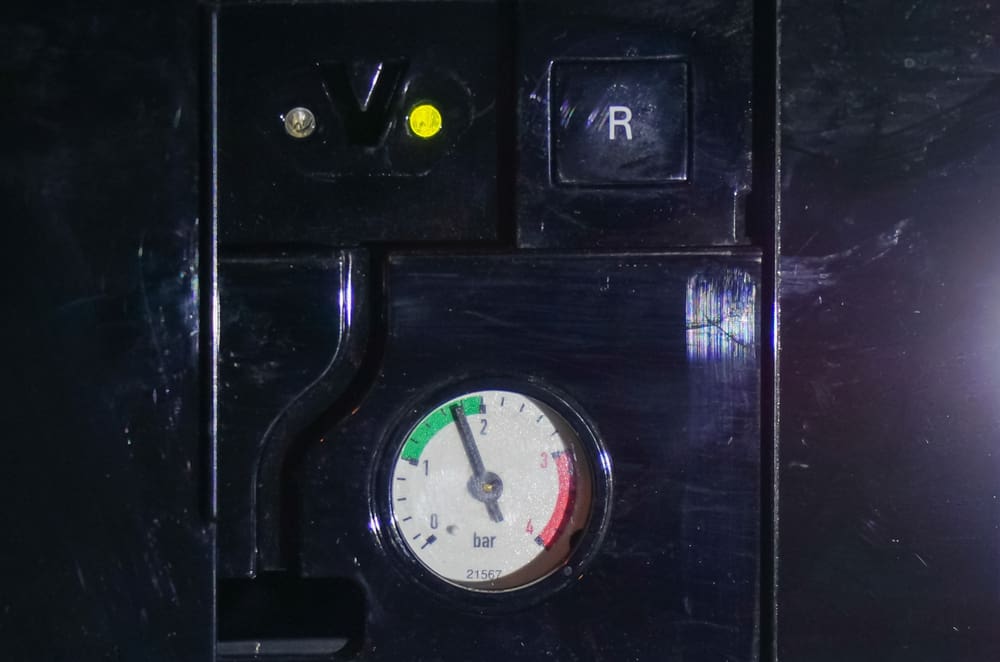
How to Reset a Gas Furnace
Resetting a gas furnace involves several key steps to ensure safe and effective operation.
- Ensure the Pilot Light Is Out: Verify that the pilot light is extinguished before proceeding with the reset.
- Adjust the Thermostat Setting: Reduce the thermostat temperature setting to its lowest level.
- Power off the System: Switch off the power supply to the furnace by turning off the corresponding breaker in the circuit box.
- Shut off the Gas Supply: Shut off the main gas supply to the furnace, keeping the pilot gas supply line open.
- Relight the Pilot Light: Use a lit match to relight the pilot light by holding it near the pilot flame jet's opening.
- Restore Power and Gas: After relighting the pilot light, turn the circuit breaker and the main gas supply back on.
- Press the Reset Button: Hold down the reset button for approximately 30 seconds.
How to Reset an Electric Furnace
Resetting an electric furnace involves a few different steps, which are outlined below.
- Power off the System: Turn off the power supply to the furnace. Locate the corresponding breaker in the circuit box, and turn it off also.
- Find the Reset Button: Locate the reset button. It’s typically found inside the blower compartment on the side of the blower motor.
- Press the Reset Button: If the reset button pops up, press it down to reset the furnace. Exercise caution as the housing may be hot.
- Replace the Cover: Once the reset is complete, return the cover to the blower compartment.
- Power On the System: Turn the power back on by flipping the breaker switch in the circuit box.
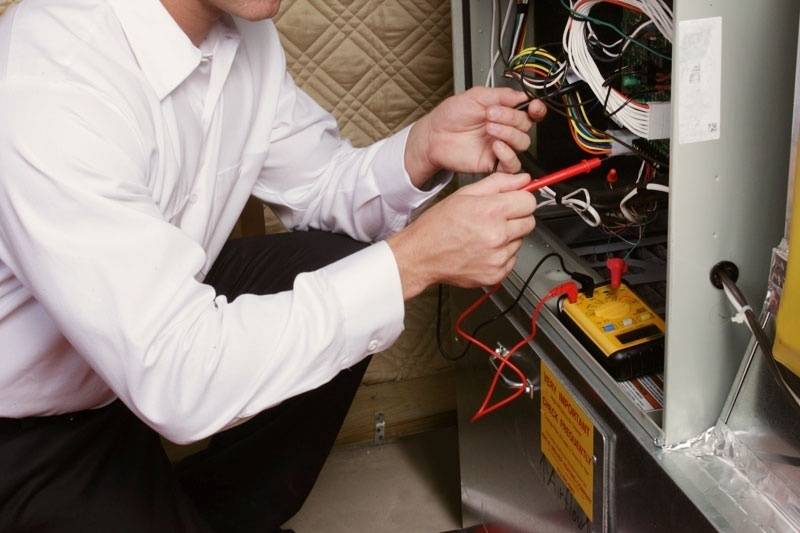
Top-Notch Emergency Furnace Services in Indianapolis and Surrounding Areas
Chapman Heating and Air has served Indianapolis and its surrounding communities with exceptional HVAC and plumbing services for over four decades. We offer comprehensive services, including emergency furnace repair, installation, maintenance, heat pump repair and installation, and indoor air quality solutions.
Whether you're facing furnace issues or seeking to enhance indoor comfort, our team is dedicated to delivering reliable and efficient service. Contact our team of expert technicians to schedule an appointment today.
Electrical problems, inadequate oil lubricant and blocked suction lines are all things that can cause your AC unit to fail. While these are important to think about, the real failure comes from lack of preventative care for your unit. We have identified the three main things that, on a larger level, cause A/C failure.
1. Regular Maintenance
The biggest thing we stress to all of our clients is regular maintenance. Our production manager Andy Gibson said it best when he said Regular maintenance really goes a long way. Not maintaining your AC unit is a lot like buying a new car and never changing the oil. We recommend cleaning and servicing your unit once a year. The ideal time to clean is spring, just before the cooling season starts. Regular changes to filters not only keeps the air in your home cleaner, it helps your unit run more efficiently, which saves you money on monthly bills and helps your unit last longer.
2. Check-Ups
While maintenance is crucial for keeping your unit clean, there are a few things too look out for between scheduled service. In the spring cottonwood and pollen can do a lot of damage in blocking up your air filter. If you can't see the coils, it's time to address the problem. Keep an eye on your filters and overall cleanliness of the unit, if it looks dirty or blocked up, it's time to call in the professionals.
3. Professional Technicians
Speaking of professionals, one thing that can really do damage on your unit is an inexperienced 'technician'. Your air conditioner is an investment and worth paying a professional to fix and maintain. Improper maintenance and a quick fix can do long term damage to your unit. Don't risk damaging your unit with inexperienced service, trust professional technicians to protect your investment and keep your unit running efficiently longer.
All of the technicians at Chapman are NATE certified. North American Technician Excellence (NATE) is an independent, third-party organization that develops and promotes excellence in the installation and service of heating, ventilation, air conditioning, and refrigeration equipment by recognizing high-quality industry technicians through voluntary testing and certification. Our technicians have passed the rigorous testing necessary to qualify as NATE Certified Technicians.
If it is time (or past time) to have someone look at your air conditioning unit, give us a call at 317-291-4909 to schedule an appointment.
Contact Chapman Heating, Air Conditioning, and Plumbing, to provide ac home repair today
- Check the settings on your thermostat. Make sure the temperature control selector is set above the current room temperature, and the system switch is on the HEAT or AUTO position. The fan switch should be set to ON for continuous airflow or AUTO if you want the blower to operate only while the furnace is operating.
- Try to get the furnace to turn on by raising the thermostat to its highest temperature setting.
- If the air flow out of your registers seems low, check the air filter. An extremely dirty air filter can block air flow.
- Make sure all registers are open and not obstructed.
- Check the power disconnect switch by the furnace.
- Check the fuse/breaker at the electrical panel for the furnace.
- Check to make sure you have fuel oil.
- If the problem persists, please call us.
Chapman Heating, Air Conditioning, and Plumbing, carries a full line of high efficiency furnaces. Contact us to recommend the best services to your home
- Check the settings on your thermostat. Make sure the temperature control selector is set above the current room temperature, and the system switch is on the HEAT or AUTO position. The fan switch should be set to ON for continuous airflow or AUTO if you want the blower to operate only while the furnace is operating.
- Try to get the furnace to turn on by raising the thermostat to its highest temperature setting.
- If the air flow out of your registers seems low, check the air filter. An extremely dirty air filter can block air flow.
- Make sure all registers are open and not obstructed.
- Check the power disconnect switch by the furnace.
- Check the fuse/breaker at the electrical panel for the furnace.
- Check to make sure you have fuel oil.
- If the problem persists, please call us.
Chapman Heating, Air Conditioning, and Plumbing, your source for hvac contractor
What we do during a Performance Tune-Up:
Performance Furnace Tune-Up
- Test for carbon monoxide leaks
- Clean burner assembly
- Clean ignition assembly
- Clean blower motor
- Inspect filtration system
- Adjust blower components
- Lubricate moving parts as required
- Test and adjust safety controls
- Tighten electrical connections
- Calibrate thermostat
- Check flue draft
- Check combustion
- Inspect vent piping
- Inspect humidification system
Performance Air Conditioner Tune-Up
- Clean condenser coil
- Inspect evaporator coil if accessible
- Clean condensate drain
- Clean blower motor
- Inspect filtration system
- Adjust blower components
- Lubricate moving parts as required
- Inspect for refrigerant leaks
- Test condensate pump
- Tighten electrical connections
- Test starting capabilities
- Measure air temperature differential
- Monitor refrigerant pressure
- Measure amperage and voltage
Performance Fan Coil Tune-Up
- Inspect evaporator coil
- Clean blower motor
- Inspect filtration system
- Adjust blower components
- Lubricate moving parts as required
- Test and adjust safety controls
- Tighten electrical connections
- Calibrate thermostat
- Inspect humidification system
- Inspect electrical heating elements
Performance Heat Pump Tune-Up
- Clean condenser coil
- Clean condensate drain
- Check defrost controls
- Inspect auxiliary heaters
- Inspect filtration system
- Lubricate moving parts as required
- Inspect for refrigerant leaks
- Test condensate pump
- Tighten electrical connections
- Test starting capabilities
- Measure air temperature differential
- Monitor refrigerant pressure
- Measure amperage and voltage


