






How to Improve Indoor Air Quality - Fight Common Sources of Indoor Air Pollution
Although it's great to get outside on nice spring, summer and fall days, Americans typically spend about 90% of their time indoors where the concentration of contaminants and pollutants are two to five times greater than the air outside. When you're cooped up inside, natural airflow is limited. For this reason, it's important to ensure that the air quality in your Indianapolis home is at a high level, especially for those who suffer from allergies, asthma or other respiratory illnesses. Even with your HVAC system running, you are still going to be exposed to much of the same air throughout the day. What this means is that anything inside your home that compromises air quality is going to stay inside and circulate. Poor air quality can cause illness, trigger allergies and asthma or just make it harder to breathe. To help keep you and your family healthy year-round, here are a few tips for keeping your indoor air quality fresh and clean.
Identify Common Indoor Air Pollutants and Pollution Sources
What Pollutants Are Found in Indoor Air?
To improve indoor air quality in your Indianapolis home, it’s important to understand the most common indoor air pollutants and where they come from. Many homes across Central Indiana experience indoor air quality issues caused by everyday activities, materials, and limited airflow. These pollutants can build up quickly, especially when outdoor air circulation is low during hot summers or cold winters.
Common indoor air pollutants include dust, pet dander, mold spores, bacteria, and microscopic particles that settle into carpets, floors, and furniture. Pet dander and allergens are especially problematic for households with pets or residents who suffer from allergies, as these particles continuously circulate through the air. In addition, volatile organic compounds (VOC) released from cleaning products, paints, and household materials contribute to indoor pollution and can negatively impact your health over time.
Poor ventilation allows these pollutants to linger, reducing overall indoor air quality. Opening windows when weather permits can help bring in outdoor air and dilute indoor pollution, but this must be balanced carefully during high pollen seasons in Indianapolis. Simple steps like keeping floors clean, regularly vacuuming, and using a damp mop can help reduce the buildup of particles that affect your indoor air.
Moisture is another major factor that impacts indoor air quality. If you do not control moisture or keep humidity levels in check, mold and mildew can develop, releasing additional air pollutants into your home. Using humidity sensors or whole-home solutions can help keep humidity levels balanced year-round and protect your indoor air quality.
To improve indoor air and create a healthier living environment, it’s important to eliminate individual sources of pollution whenever possible and reduce their emissions. This may include switching to low-VOC cleaning products, using an air purifier, upgrading air filters, and even incorporating indoor plants to support cleaner air. Air monitors can also provide insight into your indoor air quality levels, helping you make informed decisions about your home’s environment.
At Chapman Heating, Air Conditioning, Plumbing & Electrical, we help homeowners throughout Indianapolis identify and address indoor air quality concerns with customized IAQ solutions. From filtration upgrades to advanced purification systems, improving indoor air quality starts with understanding what’s in your air and taking the right steps to remove it.
Be Careful with VOC Cleaning Products
VOC (volatile organic compounds) are solid or liquid cleaning products that emit potent chemicals when used. As you can probably guess, chlorine bleach, furniture polish, aerosol sprays, oven cleaners and rug cleaners are all very common household VOCs. When these kinds of cleaners are used without precaution, the chemicals can linger in the air and can cause headaches, dizziness, nausea and more. Whenever possible, use VOCs outside to keep them out of your indoor air circulation. If you must use them indoors, make sure you are in a ventilated area, like your bathroom or kitchen, and can push the chemically tainted air outdoors.
Increase Ventilation to Reduce Stale Indoor Air
Open Windows When Weather Permits
When the weather is nice, turn off your air conditioner or furnace and let in some fresh air. Open windows can help with circulating fresh air throughout your home. Giving your HVAC a little rest can also help with your energy bill. Just be careful if you suffer from pollen allergies. While this allows for clean air to enter, it also opens the door for pollen and other outdoor allergies to enter, so act accordingly.
Keep a Healthy Humidity
During the warmer months, dust mites and mold thrive in high humidity levels. If left unchecked, these pollutants and contaminants can take hold and taint your indoor breathing air. Dust mites, mold and mildew are extremely common allergies and can trigger allergy and asthma symptoms. You may not think about humidity during the fall and winter months, but it is just as important. Low humidity levels create dry air, which helps with the spread of viruses such as the cold and flu. Maintaining a humidity level of 30 to 50% year-round will keep humidity levels in check. Utilizing a dehumidifier in your home during the summer and a whole house humidifier during the winter will keep your humidity levels at a comfortable level.
Regularly Clean, Vacuum, Mop and Dust
Maintaining a clean home is important in keeping air quality high. Dust, dirt, pet dander and other particles can build up and easily be kicked up from regular home activities. Although dirt, dust and dander aren't dangerous, they can make breathing difficult and result in coughing and sneezing as well as triggering other allergy and asthma symptoms. Vacuum carpets and furniture, use cleaning supplies without harmful chemicals and dust and mop on a regular schedule to prevent build up.
Install an Air Purifier and Upgrade Air Filters
Benefits of a Whole-Home Air Purifier System
For an extra level of protection, Chapman Heating, Air Conditioning, Plumbing & Electrical recommends installing a whole house air purifier or UV light air cleaner to your home's HVAC system. These systems integrate directly with your existing equipment to continuously treat the air as it circulates, rather than relying on portable units in a single room. Whole-home solutions are designed to capture and neutralize airborne pollutants such as pet dander, tobacco smoke, dust, and allergens so they do not re-enter your home's air supply. By improving overall air cleanliness, they can help reduce allergy symptoms, limit airborne irritants, and create a healthier indoor environment for your family.
How Air Filters Help Capture Pollutants
Your HVAC air filters play a critical role in trapping pollutants before they circulate throughout your home. As air moves through your system, filters capture dust, debris, and microscopic particles that can impact indoor air quality. It’s important to change your HVAC filter regularly, typically about every three months, but homes with pets, allergies, or higher usage may require more frequent replacement. Choosing the right filter type and rating can also improve performance and efficiency. To learn more about selecting the right hvac filtration system, consider consulting with a professional to ensure your system is properly equipped to handle your home's air quality needs. Always refer to your owner's manual for the correct replacement schedule and specifications.
Contact Chapman Heating, Air Conditioning, Plumbing & Electrical for Indoor Air Quality Solutions
If you're prepping for fall and winter and want to make sure your air conditioner and furnace are ready to tackle the tumultuous seasons, give Chapman Heating, Air Conditioning, Plumbing & Electrical a call, or contact us online for an inspection or to install indoor air quality solutions in your home.
Schedule Online (317) 207-9378
Resetting your gas or electric furnace is a simple task that can often resolve common issues such as a malfunctioning thermostat or a tripped circuit breaker. Whether you have a gas or electric furnace, knowing how to reset it can save you time and money on unnecessary service calls.
Keep reading to learn how to safely reset your furnace to keep your home comfortable when it’s cold outside.
Table of Contents
What Is a Furnace Reset Button?
The furnace reset button is a crucial safety feature within your home's HVAC system, allowing for rapid shutdown in case of overheating or malfunction. When triggered, it cuts power to the furnace to prevent potential hazards. However, frequent tripping of this button signals an underlying issue such as overheating.
Does Your Furnace Have a Pilot Light or Electronic Ignition?
Before you reset your furnace, it's important to know whether your unit uses a standing pilot light or an electronic ignition system. Most newer gas furnaces installed in Indianapolis homes no longer have a continuously burning pilot light. Instead, they use an electronic ignition controlled by the thermostat and the furnace's internal safety controls.
Furnaces installed within roughly the last 20 years typically use hot-surface or intermittent-pilot electronic ignition rather than a standing pilot light — which is why manually relighting a pilot with a match doesn't apply to most modern systems.
If your furnace was manufactured within the last 20 to 25 years, it likely has electronic ignition. These systems automatically ignite the burners when your thermostat calls for heating. Older systems may still rely on a standing pilot light, which must remain lit for the gas burners to operate properly.
If your heating system won't start, begin with a few simple checks before attempting a furnace reset:
- Verify your thermostat is set to "Heat" and the temperature is above the current room temperature.
- Make sure the breaker hasn't tripped. If necessary, reset the circuit breaker once and restore power to the unit.
- Locate the furnace reset button (if your model has one). Press and hold the reset button for the amount of time recommended by the manufacturer—typically just a few seconds.
- If your system has a standing pilot light, check whether it has gone out. Never attempt to relight a pilot light if you smell gas. Leave your home immediately and contact your utility company.
If the reset button immediately trips again or your breaker continues to trip after you reset it, there is likely a larger electrical or mechanical issue that requires professional repair. Continuing to repeatedly press the reset button can damage your equipment or mask an underlying safety problem.
A clean, efficiently burning gas furnace produces only small amounts of carbon monoxide, while a dirty or malfunctioning one can produce deadly amounts — never operate a furnace without its front safety panel properly in place.
Safety Precautions Before You Reset Your Furnace
Before attempting to reset your furnace, take a few minutes to perform some basic safety checks. Many heating problems are caused by a simple thermostat setting or a tripped breaker, but others require professional diagnosis. If you're ever unsure, Chapman Heating, Air Conditioning, Plumbing & Electrical is available to provide safe, reliable furnace repair throughout the Indianapolis area.
| ✓ Safe to Check Yourself | ⚠ Stop and Call Chapman Heating |
|---|---|
| Confirm the thermostat is set to Heat and increase the temperature a few degrees. | You smell natural gas or suspect a gas leak. |
| Check your home's electrical panel for a tripped circuit breaker. | The circuit breaker or furnace reset button continues to trip. |
| Press the furnace reset button once, following the manufacturer's instructions. | The furnace won't restart after one reset attempt. |
| Replace a dirty air filter if it restricts airflow. | You hear grinding, banging, squealing, or other unusual noises. |
| Verify all furnace access panels are securely closed before restoring power. | The system repeatedly shuts down, blows only cold air, or won't produce heat. |
| Turn off power before opening any service panel. | You're uncomfortable working around electrical or gas heating equipment. |
Where Is the Reset Button on a Furnace?
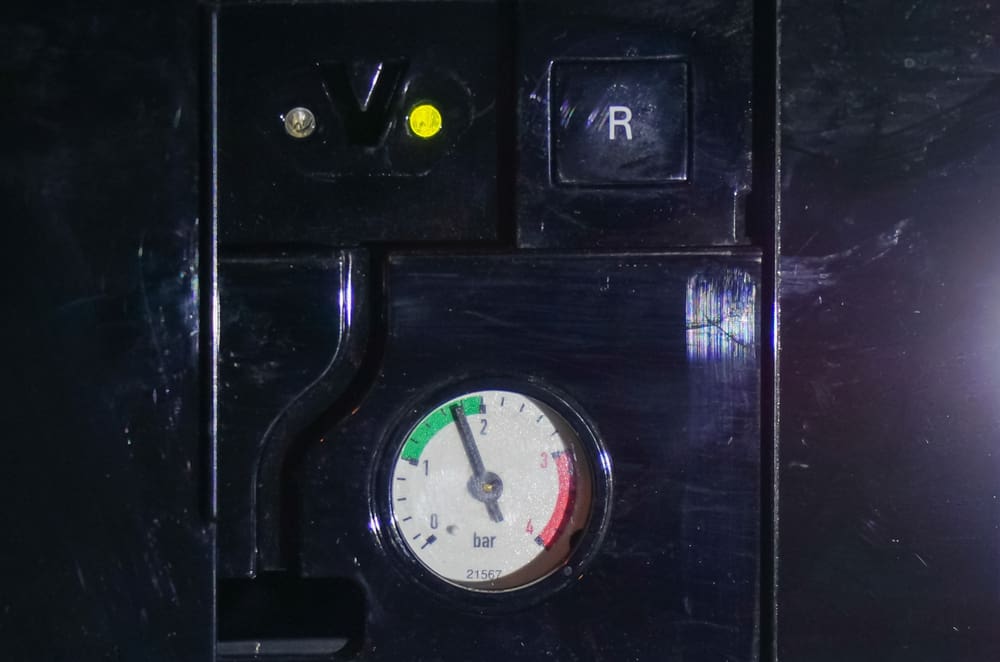
It’s typically colored red or yellow for easy identification and is commonly found inside the blower compartment. The reset button on a furnace serves as a vital safety feature. Remember that it’s normal for furnaces to require occasional resetting, especially in response to overheating. If the furnace frequently requires resetting, you should have it inspected to address any underlying issues.
How to Reset a Gas Furnace
Resetting a gas furnace involves several key steps to ensure safe and effective operation.
- Ensure the Pilot Light Is Out: Verify that the pilot light is extinguished before proceeding with the reset.
- Adjust the Thermostat Setting: Reduce the thermostat temperature setting to its lowest level.
- Power off the System: Switch off the power supply to the furnace by turning off the corresponding breaker in the circuit box.
- Shut off the Gas Supply: Shut off the main gas supply to the furnace, keeping the pilot gas supply line open.
- Relight the Pilot Light: Use a lit match to relight the pilot light by holding it near the pilot flame jet's opening.
- Restore Power and Gas: After relighting the pilot light, turn the circuit breaker and the main gas supply back on.
- Press the Reset Button: Hold down the reset button for approximately 30 seconds.
How to Reset an Electric Furnace
Resetting an electric furnace involves a few different steps, which are outlined below.
- Power off the System: Turn off the power supply to the furnace. Locate the corresponding breaker in the circuit box, and turn it off also.
- Find the Reset Button: Locate the reset button. It’s typically found inside the blower compartment on the side of the blower motor.
- Press the Reset Button: If the reset button pops up, press it down to reset the furnace. Exercise caution as the housing may be hot.
- Replace the Cover: Once the reset is complete, return the cover to the blower compartment.
- Power On the System: Turn the power back on by flipping the breaker switch in the circuit box.
Why You Might Need to Restart Your Furnace
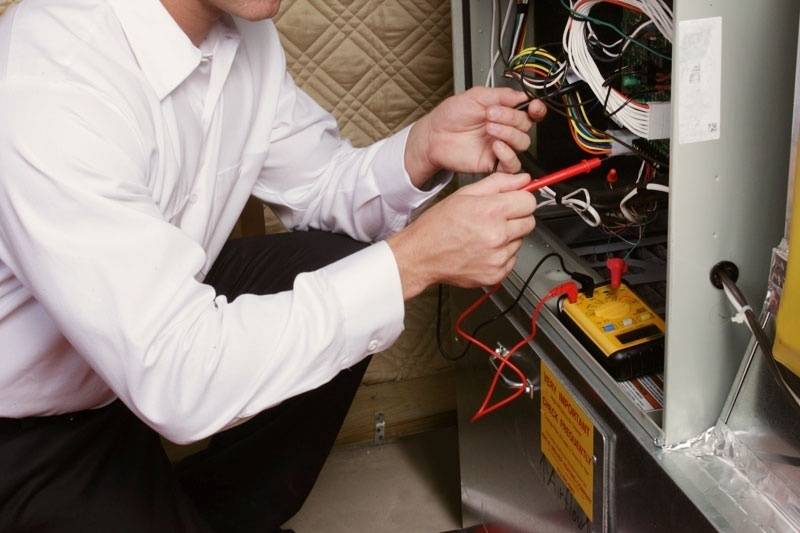
During the colder months, maintaining a functional furnace is crucial for indoor comfort. In certain situations, such as when the furnace becomes overheated, a reset may be necessary to ensure proper operation. This action halts the furnace and allows for a safe restart, preventing potential issues like a tripped circuit breaker. Here are some reasons why you might need to reset the furnace:
- Fuel Depletion: Running out of fuel can cause the reset button to trip. Check the fuel tank and refill if empty before attempting a reset.
- Closed Gas Valve: A closed gas valve connection can impede furnace operation. You may be able to remedy this problem by opening the valve manually.
- Flame Sensor Problems: Malfunctioning flame sensors can trigger a reset. In such cases, we advise contacting Chapman for a prompt inspection and efficient repairs.
Top-Notch Emergency Furnace Services in Indianapolis and Surrounding Areas
Chapman Heating and Air has served Indianapolis and its surrounding communities with exceptional HVAC and plumbing services for over four decades. We offer comprehensive services, including emergency furnace repair, installation, maintenance, heat pump repair and installation, and indoor air quality solutions.
Whether you're facing furnace issues or seeking to enhance indoor comfort, our team is dedicated to delivering reliable and efficient service. Contact our team of expert technicians to schedule an appointment today.
Summer downpours can wreak havoc on basements. Whether you live in a new house or an old one, no house is completely safe from a flooding basement. And trust us, no one wants a wet basement!
Just one to four inches of water in your basement can cost up to $10,000 to repair and dry. That doesn't even enter the water damage caused to your floors, walls, technology and the possible damage to priceless pieces of furniture, photos and other heirlooms.
A flooded basement can cost a small fortune. The best way to prevent basement flooding from occurring is to prepare as if a flood could always be right around the corner.
Preparing for a flood before it happens is the only sure-fire way to avoid having to deal with and pay for the devastating damage of flooding basements. Fortunately, the plumbers at Chapman Heating, Air Conditioning, Plumbing & Electrical offer up some simple tips you can take to avoid them all together and keep your basement dry and safe.
Key Takeaways About Preventing Basement Flooding
- Preventing basement flooding starts with routine maintenance, including cleaning gutters, extending downspouts, and directing water away from the home’s foundation.
- Sump pumps play a critical role in basement flood prevention and should be tested regularly to ensure they activate and discharge water properly during heavy rain.
- Foundation cracks, poorly sealed basement windows, and clogged drainage systems can allow water to enter and increase the risk of costly water damage.
- Backup sump pumps, water alarms, and battery-powered systems help protect Indianapolis homes during power outages and severe storms.
- Proactive basement flood prevention can help homeowners avoid expensive repairs, structural damage, mold growth, and loss of personal belongings during heavy rainfall.
Clear Your Gutters and Downspouts
We know it's a dirty, nasty chore, and no one likes doing it, but cleaning your gutters is more important than just keeping your house looking nice.
Clean gutters let rain water flow uninhibited through the gutter, down the downspout and away from your house's foundation. Cleaning your gutters of any gunk or leaves prevents water from building at the base of your house and seeping into your basement.
A good rule of thumb is to direct water at least 3 feet away from the foundation, so an extension and/or troughs are never a bad idea. So, grab your ladder and gloves and get cleaning!
Check Your Sump Pump
A sump pump is a vital piece of equipment for any basement. Installed at the lowest point in your basement, water flows downhill and fills up the sump pit until it is triggered to push the water to the nearest sewer or retention pond.
You never want to realize your sump pump isn't working when you've got a basement full of water, so make sure to regularly check your unit. It's as simple as slowly dumping 5 gallons of water into your sump pump and waiting to see if it moves the water.
If it isn't working properly or something seems to be going wrong, make sure to call Chapman Heating, Air Conditioning, Plumbing & Electrical to take a look. It could be a quick fix or maybe time to upgrade.
Inspect Your Foundation
Older houses often run higher risks for basement flooding simply because of wear and tear that can occur to interior and exterior foundations over time. Cracks in basement walls and floors are extremely common.
If your home has been around to see the last couple of decades , or even centuries , make sure to take the time to give it a proper inspection.
Simple epoxy, masonry sealer and similar products can be used to repair foundation cracks and small damages that will let water find its way into your basement.
But, like dealing with plumbing and other home appliances, leave the big stuff to the pros. Some things that can seem like relatively small problems or simple fixes can end up being some of the most complex problems when it comes to foundation issues.
Use Window Well Covers
Window wells for your basement are a great way to let in natural light and fresh air, but they become swimming pools when the rain gets too heavy.
If your windows aren't properly sealed , and even if they are , the excess amount of water build up can lead to leaks.
One way to ensure your window wells don't fill up is through installing window well covers. These simple covers are easy to install and come in a range of material and prices as low as $20 at your local hardware or home improvement store.
Average Cost of Flood Damage
Depending on the type of damage, amount of water and location, the cost varies from a few hundred to thousands. According to Floodsmart.gov, drying a flooded basement can cost anywhere from $500 - $20,000.
- 1-4 inches: the estimated cost is $10,00 or more, depending on the size of the basement.
- 5- 8 inches: Flood Smart estimates roughly $20,000 in damage.
Try out the flood simulator to see how much it would cost if it were your home. You never know when flood waters might hit. Take Wildwood, New Jersey for example. A coastal town familiar with storms and flooding in the warm season, they were not prepared for what happened in the middle of winter. Warmer weather melted the snow and sent over 9 feet of flood water into the homes and basements of the town's residents.
Average Life Span
Sump pumps are relatively low-maintenance. Routine checks keep systems working properly. We recommend regularly checking the discharge line, inlet screen and pit to clear any debris or blockage. Slowly pour a bucket of water down the drain to test the pump. Check outside to make sure the water is going where it is supposed to , far away from the home.
When your pump start showing its age , or stops working the way it's supposed to, it's time for a replacement. A sump pump life span is about 5-7 years. You don't want to be left vulnerable when you need a pump the most, so it's a good idea to replace it when it reaches this age range.
Not only are newer pumps more reliable, technology updates have made them faster and more efficient at removing water.
Backup Precautions
A flood could happen at any time, sometimes without you knowing. Wi-Fi enabled water alarms alert you to water in the basement when it happens. This is your first step to minimizing damage and cost in the event of a flood.
Usually one of the first things to go in bad weather is the power. If you're lucky, the power stays on, your pump is in good working order and the basement stays dry. If not, a backup sump pump is your best line of defense against expensive water damage.
Battery pumps or water powered backup pumps can easily be installed in normal to narrow sump pits. They automatically begin pumping during power outages, when the main pump fails or when water exceeds the capacity for the main pump.
The investment to purchase a battery or water powered pump is worth the peace of mind. On average backup pumps cost between $1,600 , $2,200, depending on the pump selection and installation requirements.
Backup sump pumps are worth the time and money to protect your home. When you're ready to talk about sump pumps, the installation process and how your whole home will benefit from one, give us a call or schedule an appointment.
Call Chapman's for Sump Repair or Installation
Finding a basement full of water is no time to start thinking about preventing a flood. These simple checks can save you thousands! Contact Chapman today if you suspect an issue with your foundation or sump pump to ensure that your basement will stay safe and dry.
At some point in a homeowner’s journey, residents will come across the common aggravation that is low water pressure. This leads to the pertinent question “Why is my water pressure low?” There is a multitude of reasons for low water pressure, and knowing those reasons and the common background behind water pressure will alleviate homeowner stress.
Symptoms of Low Water Pressure
You’ll know when water pressure in your house isn’t right. Around Circle City, Hoosiers often notice the problem first thing in the morning or when more than one faucet is running. Here are some of the most common signs:
- Faucets that only drip or trickle instead of a steady stream
- Showers that feel weak and take forever to rinse soap or shampoo
- Appliances like dishwashers and washing machines that run longer than normal
- Toilets that take too long to refill after flushing
- Water flow that drops sharply when two or more fixtures are in use
If you’ve noticed these issues in your Greater Indy area home, it’s a good idea to dig into the cause before the problem gets worse.
What Is a Normal Water Pressure Level?
A normal water pressure for your house ranges from 45 to 80 psi. Anything below that level constitutes low water pressure. If you are feeling wary that your water pressure is low, use a test gauge that measures psi. This handy tool can be found at most hardware stores. To measure your home’s water pressure, screw the gauge onto the hose spigot on the outside of the home. Turn the valve on, and your reading will appear.
7 Causes of Low Water Pressure
1. Water Demand
A common cause for low water pressure can be due to high water demand within the household. When multiple taps are used throughout the house, this can drop the water pressure below a satisfactory level. Between the multiple taps being used throughout the home, the demand becomes too high, leading to low water pressure.
This can easily be fixed by making sure the use of water throughout the house is divided properly by staggering activities that rely on water consumption. Examples would be avoiding showers when running the dishwasher and making sure multiple sinks aren’t being used at the same time.
2. Closed Shut-Off Valves
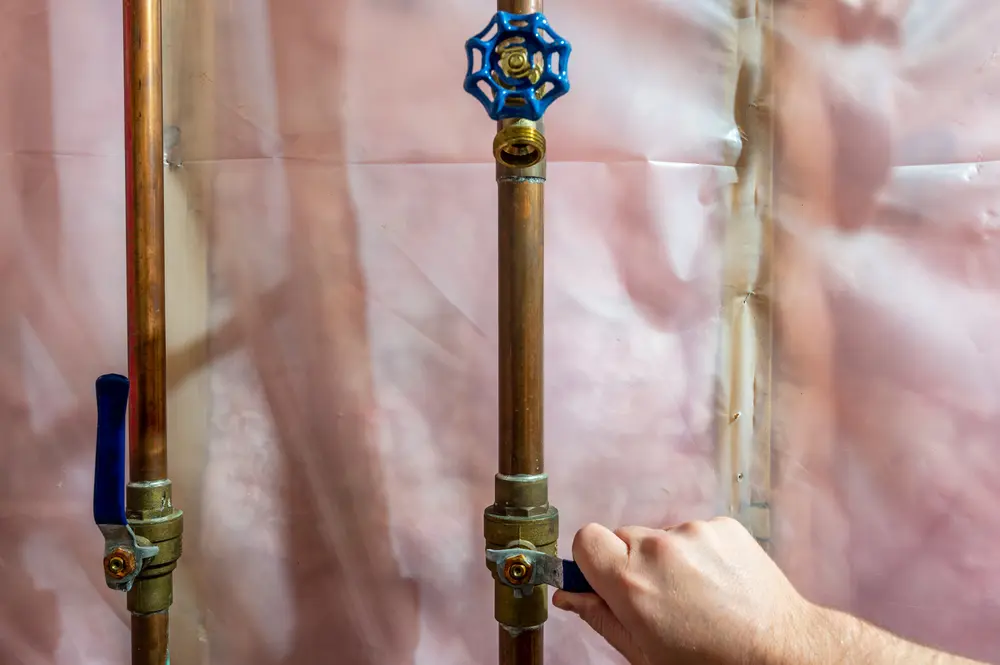
The main water shutoff valve regulates the flow of water in a home. If your water pressure is low, it may be because this valve is partially closed. For your home to receive proper water pressure, it’s essential that these valves are open.
The main shutoff valve can be located near the outside hose spigot or inside the home in the utility room. Make sure the valve is turned all the way to the opened position. Harsh winters in Indiana can lead to issues for not only your shutoff valve but also other plumbing fixtures in a home. Chapman Heating, Air Conditioning, Plumbing & Electrical can assess the situation, determine the issue, and offer a long-lasting solution.
3. Plumbing Fixture Issues
Another issue that may cause low water pressure is fixture issues. One thing to keep in mind is the aerator on a faucet fixture. The aerator is designed to reduce an influx of water flow from the faucet without compromising water pressure. Aerators can be prone to buildup by limestone, rust, or dirt. This can be fixed by removing the aerators on your faucets and inspecting them for these issues. Reinstall the aerators once they have been cleaned to determine if the water pressure is now at a good level.
Fixtures themselves can also get clogged, and given that they are relatively inexpensive, replacing them is a viable option.
4. Broken Pressure Regulator
The plumbing system within your home contains a component known as the pressure regulator. This regulator keeps water pressure at a comfortable level in your home. Your water pressure may become low or high depending on if this component is broken.
The pressure regulator is a bell-shaped component near your home’s hose connection. You can adjust the pressure regulator accordingly depending on your home’s water pressure issues, whether high or low. High water pressure in particular can cause other problems like damaged faucets, showerheads, appliances, and water lines. Call a plumber if you believe your pressure regulator needs replacing.
5. Sediment Buildup
Sediment buildup within a pipe’s walls can lead to clogged pipes over time. Minerals flowing through running water can create buildup that will ultimately induce low water pressure. A common sign of this issue is initially observing good water flow that dwindles to mere drops.
Routine checkups by your plumber will help determine the current health of your pipes to curve the chance of sediment buildup being the root cause of your water pressure problems.
6. Corrosion
Corrosion issues pertain to homeowners with metal pipes. Corrosion develops over time within metal pipes and will restrict water flow. Corroded pipes may affect a small section of pipes within a home or the whole plumbing system.
Calling a plumber will help determine whether your pipes need cleaning or if they need to be replaced. Chapman Heating, Air Conditioning, Plumbing & Electrical can offer full pipe repair or replacement in the Indianapolis area.
7. Small Branch Lines
The vertical supply stack lines that come off the plumbing system are known as branch lines. These branch lines lead to different plumbing fixtures. Low water pressure can also mean that your branch lines are too small to satisfy your home’s water demand. The fix to this issue would be best suited for your plumber to gauge if your home needs bigger branches.
Quick DIY Fixes
If low water pressure strikes your home, it can be a daunting task of what to do. Thankfully, there is a list of quick do-it-yourself fixes anyone can do before restoring to a local plumber.
Check Your Shower Heads
A simple solution to low water pressure issues can be checking your shower heads. Your shower head may have developed too much buildup. If different faucets and taps throughout your home have different water pressure levels, this is the best place to start.
Soaking your shower heads with vinegar and then cleaning them regularly afterward can help clear up depository buildup.
Drain Your Water Heater
Water heaters can also develop sediment buildup. Homeowners should regularly practice draining their water heater once a year. If this isn’t practiced, this can take years off of your water heater’s lifespan. Turn off the water heater first, then drain the tank.
Clear Debris From Pipes
Miscellaneous debris can cause your pipes to get clogged. As mentioned above, clogged pipes can cause low water pressure. A cable or snake drain that’s fed down your pipes can do a great job of unclogging your pipes. Doing this task regularly is a healthy way to help the timespan and efficiency of your home’s pipes.
Fix Low Water Pressure with the Expert Plumbers at Chapman
If these DIY tasks haven’t fixed your water pressure issues, it’s probably time to contact a local professional. Low water pressure can be caused by a degree of issues. Indianapolis area residents can have faith in the certified professionals at Chapman Heating, Air Conditioning, Plumbing & Electrical for their plumbing needs that range from routine inspections, pipe replacements, cleaning, repair, and more to fix low water pressure in your home. Schedule an appointment with Chapman Heating, Air Conditioning, Plumbing & Electrical today.
If you've ever experienced your dishwasher backing up into your sink, you know how frustrating and messy it is. This common household issue can stem from something as simple as a clog to more serious plumbing issues.
Let’s take a look at common reasons why your dishwasher might be backing up into your sink along with practical steps to address the problem. Whether it's a minor blockage or a more complex plumbing issue, understanding the causes and knowing what to do next can help you resolve the issue swiftly.
Why Your Dishwasher Might Be Backing up Into Your Sink
Several factors may contribute to this problem, ranging from minor clogs to more serious plumbing issues. Understanding the underlying causes of this issue can help you tackle the issue effectively. Here's a brief overview of possible reasons why your dishwasher is backing up into your sink.
Clogged Sink
Experiencing a clogged sink is not only an inconvenience but can also lead to your dishwasher backing up into the sink. Several factors contribute to sink blockages, ranging from food debris and grease buildup to plumbing issues.
A clogged sink impedes proper drainage, causing water from the dishwasher to back up into the sink.
Obstructed Dishwasher Drain
Is your dishwasher overflowing with water and causing a leak? It could be due to an obstructed drain that causes water to back up into your sink. Culprits like food scraps, grease, or even forgotten utensils can form a blockage in your dishwasher drain.
When the dishwasher drain gets clogged, water backs up into the sink, turning your kitchen into a wet mess.

Jammed Garbage Disposal
If your garbage disposal is jammed or malfunctioning, it can disrupt the drainage flow, leading to water backing up into the sink. Dishwashers often share drainage connections with garbage disposals, making them more susceptible to the consequences of disposal issues.
A backed-up sink is just the tip of the iceberg; a jammed disposal can exacerbate the situation, causing water to overflow into the sink and beyond.
Blocked Air Gap
The issue might be a blocked air gap. A blocked or improperly installed air gap can disrupt drainage flow, leading to water backing up into the sink. Dishwashers rely on air gaps to prevent backflow, making them vulnerable to issues when the air gap is blocked.
When the air gap is blocked, water from the dishwasher seeks refuge in the sink, turning your kitchen into a splash zone.
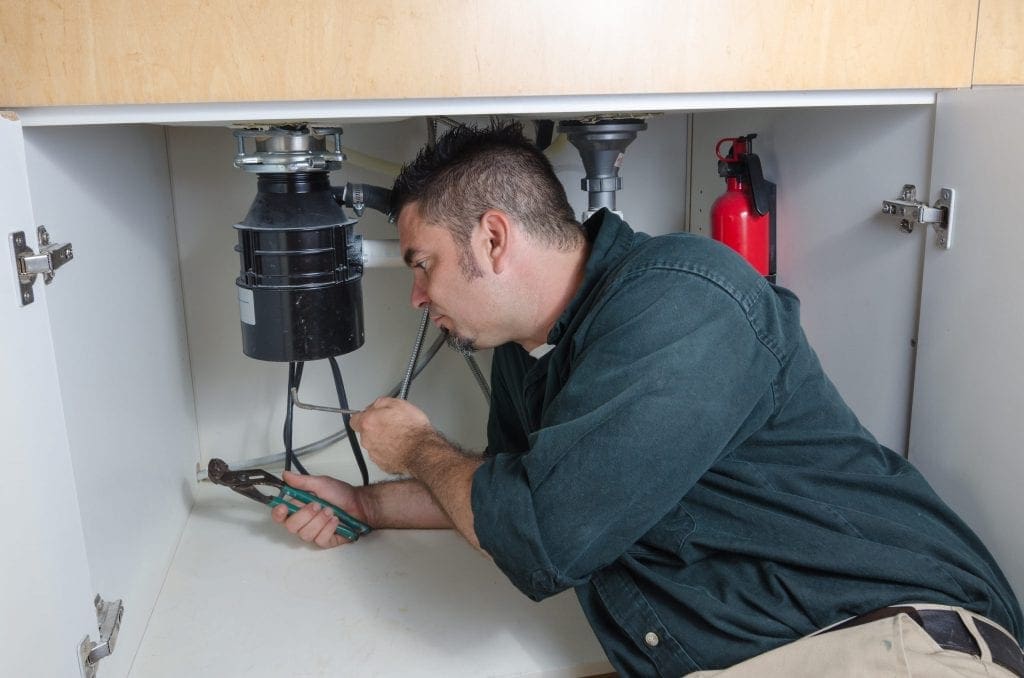
Expert Solutions for Clogged Sinks and Dishwasher Backups with Chapman
Looking for reliable plumbing solutions in Indianapolis or a surrounding area? Look no further than Chapman Plumbing. With a team of experienced professionals, Chapman offers a range of expert plumbing services to address all your needs.
Whether it's fixing a clogged sink, resolving dishwasher backups, or tackling more complex plumbing issues, Chapman has you covered. Our plumbers are dedicated to providing top-notch service and ensuring customer satisfaction every step of the way. Schedule an appointment with Chapman today!
Fix Your Clogged Sink or Dishwasher Backup Today!
If you've lived in Indiana for any length of time, you know the month of April is full of pop-up rain showers and thunderstorms. All of that rain tends to lead to flooding and, if your basement is prone to flooding, you'll want to take precautions in order to keep your home and possessions safe and dry.
Why Does My Basement Flood?
Many families in Indianapolis and beyond find themselves facing the same problem every time it rains , a flooded basement. This can lead to a variety of issues, including mold growth, damage to your belongings, and structural damage to the building. But why is it happening?
If your home has a sump pump, you shouldn't find that your basement is flooding consistently. A sump pump's job is to effectively pump water away from the home's foundation. A failing sump pump, though, won't be able to pump water away from the home, allowing water to pool into your basement.
However, the cause of consistent flooding can go beyond sump pump issues. Water pooling, sewer backup, and water damage to the foundation of the home can all be at fault. To have your basement inspected and to determine what the cause of your spring basement flooding is, get in touch with a professional.
Emergency Power Source
Spring basement flooding will often cause electrical outages. It's important to be prepared by installing an emergency power source. Install a generator to provide emergency electrical service for your furnace, refrigerator, and septic tank pump in case power is lost.
If you do not have a generator installed, you could find yourself running into flooding, frozen pipes, or a flooded septic tank. These issues can cause even bigger and more expensive problems down the road.
Install a Sump Pump
A sump pump is vital to keeping your basement dry and pumping water away from your home. This device pumps groundwater from heavy rain out of the pump pit in your basement. If you don't already have a sump pump, you will need to have one installed.
If you already have a sump pump, but you still find that your basement is flooding, get in contact with a plumbing professional. They can inspect your sump pump to determine if it is still working and, if it's not, they'll be able to replace it.
Install a Backup Sump Pump
Even the most reliable piece of equipment can malfunction and fail. That's why it is important to invest in a backup sump pump system. A backup sump pump, even a battery-operated model, can begin working if the main sump pump is out of commission. This will greatly reduce your chances of basement flooding. Some systems even come with additional security features like an alarm that will alert you if the battery-operated sump pump has started to work.
Preparation is key to protecting your home and everything in it. By properly preparing for heavy rain with the installation of a backup sump pump, you'll ensure that your home stays safe and dry.
Contact Chapman for Sump Pump Installation
Spring storms can really take a toll on your basement. Flooding costs homeowners thousands of dollars on average each year. Get in contact with Chapman today to discuss your options and to determine how you can protect your home from the damage caused by flooding.
If you deal with basement flooding year after year, it's time to do something about it. Call us at (317) 207-9378 for more information about sump pumps, or schedule an appointment with us today.
Homes in Indianapolis and beyond look forward to the warm weather brought by spring. After spending many months cooped up inside during the colder winter months, many families will jump at the first chance to spend some time outside in the warm weather. As spring arrives and the weather gets warmer, however, those within your home will likely deal with symptoms caused by seasonal allergies.
One of the main causes of seasonal allergies, cottonwood, can cause a variety of allergy symptoms. However, cottonwood can also cause serious and expensive problems with your home's air conditioning system.
What is Cottonwood?
Cottonwood is the little white tufts of cotton that have been floating through the air. They come from cottonwood trees. Notorious for causing allergy symptoms like sneezing, itchy eyes, and congestion, cottonwood can wreak havoc on your family if it manages to get into your air conditioner's condenser coils. However, it can also cause issues to the AC system itself.
Unfortunately, one cottonwood tree can cause hundreds of dollars worth of damage to your air conditioning unit. Cottonwood produces small and fuzzy bits of cotton that fly around outside and can latch onto your air conditioner coils. They can easily be sucked into a condenser coil and cause reduced airflow across the coil.
Over time, this will cause your air conditioner to become less energy efficient. It will have to work twice as hard as it normally would, causing you to pay more money for the same, or even less, cool air than you might usually have. These problems can build and could potentially even result in an overheated compressor, requiring you to have an expensive replacement installed.
How to Protect Your AC Unit
Don't wait until your air conditioner is beyond the point of a simple repair. The easiest way to get rid of a cottonwood problem is to have your air conditioner professionally cleaned as soon as possible. You might think this is an easy task to handle yourself, but we strongly recommend the help of a professional. If you try to clean off the coil yourself, you might embed the cottonwood seeds deep into the coils and make the situation worse.
Air Conditioning Cleaning Services
Certified HVAC technicians understand how every make and model works because they have received the proper training. Your air conditioning technician should be able to inspect your system, determine if cottonwood is causing any airflow problems, and properly clean out the cottonwood.
Beyond being incredibly important to your home's comfort during the warm weather, air conditioners are very expensive to replace if you try to fix the issue yourself and cause further damage. Trying to fix the issue yourself might end up damaging your machine beyond repair. To avoid causing irreparable damage, get in touch with a professional.
Contact Chapman for Air Conditioning Services
Don't let the increased amount of cottonwood in the air ruin your air conditioner. Solve the problem by calling an HVAC service technician to properly clean your machine. They will make sure your coils are cleaned without doing more damage to your AC unit. Save yourself the time and money, and pick up the phone and call Chapman Heating and Air Conditioning at (317) 207-9378 or schedule a service appointment online today!
During the rainy Indiana spring, summer and fall, one of the most important pieces of equipment you can have in your home is a sump pump.
Although important, sump pumps are an underappreciated part of essential home plumbing. We get a lot of common questions about sump pumps regularly, so we wanted to share with you Chapman Heating | Air Conditioning | Plumbing's answers to the frequently asked plumbing and sump pump questions.
What does a sump pump do?
A sump pump's purpose is pretty straight forward: it keeps water out of your basement and home and prevents flooding. Water that builds up around the base of your home because of sloping driveways, sidewalks or patios or full gutters.
Since water flows downhill, a sump pump is installed at the lowest point in your basement or crawl space. This ensures the collection of as much water as possible. Rain water is built up in the sump pit and then pushed to the nearest retention pond or storm drain , away from the house.
How can I tell if my sump pump is working?
The best way to test if your sump pump is working (before it's too late) is to test it yourself. Fill a 5-gallon bucket of water pour it into the sump pit.
As it fills, it should active the float trigger. After a few minutes, the water should drain and the pump should shut itself off.
If you've surely activated the float trigger and no water runs, the pump continues to run well after the water has been drained or you hear any strange noises coming from the sump pump, it may be a good idea to have it looked at. Try testing it every couple months, especially if it's an older unit.
How long will a sump pump last?
The average lifespan of a sump pump is around 10 years. However, depending on how frequently it is used, checked and maintained, it can be longer or shorter than that.
If you begin to notice persisting issues such as your unit not kicking on during heavy rain or a professional diagnosis a serious issue upon inspection, this is one piece of equipment you can't afford to wait to have repaired or replaced.
The cost of a new sump pump nowhere nears comparison to the amount of money it can cost a homeowner to deal with flood damage and repair in the basement of their home.
Can I install a sump pump myself?
Even for the most experienced DIYer, the proper installation of a sump pump is a tall order.
Proper installation not only requires a good knowledge of plumbing but the right tools and knowledge to safely break through foundation and earth and then the actual installation of the plumbing.
Much like HVAC care and installation, it is highly recommended that you leave the installation of your sump pump and other plumbing equipment to the professionals like Chapman Heating | Air Conditioning | Plumbing.
Our service technicians aren't only properly equipped, they have expert knowledge on how to quickly, efficiently and best install your equipment to ensure it is ready to work when you need it most.
Seasonal allergies don't stop at the front door. Pollen, dust, and pet dander can easily make their way inside your home, triggering uncomfortable symptoms long after you leave the outdoors.
If you're wondering "do air conditioners help with allergies?"—the answer is yes, when properly maintained and used correctly.
Your air conditioning system can be one of the most effective ways to reduce allergens and improve indoor air quality throughout the year. Understanding the connection between allergies and air conditioning—and how your HVAC system helps control indoor allergens—can make a noticeable difference in how you and your family feel, especially during warm weather months.
What Causes Allergy Symptoms in Your Home
Many people associate allergies with spring and fall, but indoor allergy symptoms can linger year-round. The source often isn't just outdoor pollen—it's what builds up and circulates inside your living space.
Common indoor allergens include:
- Pollen that enters through open doors and windows
- Dust and dust mites that thrive in carpets and upholstery
- Pet dander from cats and dogs
- Mold spores in damp areas
- Air contaminants that recirculate through your HVAC system
How Dust, Pollen, and Other Allergens Trigger Reactions
Every time you open doors or windows during warm weather, pollen and outdoor allergens can enter your home. Once inside, they settle into carpets, furniture, bedding, and ductwork.
Dust particles act as carriers for these allergens, allowing them to become airborne again whenever air moves through the house. Without proper air filters and regular maintenance, your AC can blow dust all throughout your living space, triggering reactions in people who are sensitive.
The cycle works like this: Air contaminants enter your home → They settle on surfaces → Your HVAC system pulls air in → Without clean filters, it can circulate airborne allergens back into every room.
This is why air conditioning itself isn't automatically helpful—it needs to be properly maintained to protect your indoor air quality.
The Role of Mold and Mites in Indoor Allergy Problems
Moist environments create the perfect breeding ground for mold, especially in areas like:
- Drain pans and AC coils
- Basements and crawl spaces
- Bathrooms with poor ventilation
- Any area where humidity levels stay consistently high
Dust mites also thrive indoors, particularly in humid conditions. Both mold and mites are common triggers that contribute to sneezing, congestion, watery eyes, and even asthma symptoms in sensitive individuals.
How Humidity Makes Allergens Worse
High humidity doesn't just feel uncomfortable—it creates ideal conditions for allergen growth. When moisture levels rise above 50%, mold spores spread more easily, and dust mites multiply faster.
Managing indoor humidity is one of the most overlooked ways to reduce allergy symptoms at home. That's where your air conditioner plays a crucial role in maintaining health and comfort.
Can Air Conditioning Help Allergies?
Yes—when used correctly, air conditioning can significantly improve allergy symptoms.
Your AC does more than cool your home. When operating correctly, it helps:
- Regulate airflow to keep air moving and filtered
- Control moisture to reduce humidity that fuels mold growth
- Filter airborne particles before they circulate through living spaces
- Maintain consistent indoor conditions that discourage allergen buildup
By keeping windows closed and running your air conditioning during high-pollen days, you limit how much pollen and outdoor allergens enter your living space. This creates a cleaner, more controlled indoor environment that's easier on people with allergies or asthma.
However, AC units can be part of the problem if they're not maintained. A dirty system may actually make symptoms worse by spreading dust, mold, and other irritants.
How Your AC Filters and Cleans the Air
Your HVAC system's air filters serve as the first line of defense against allergens. As air moves through the system, filters trap particles like pollen, dust, pet dander, and mold spores before they circulate through your home.
High-quality filters can capture:
- Pollen particles from trees, grass, and weeds
- Dust and dust mites
- Pet dander from household animals
- Mold spores
- Other airborne allergens down to microscopic sizes
The effectiveness depends entirely on filter quality and maintenance frequency.
How Often to Change Your AC Filters to Prevent Mold and Allergen Build-Up
Dirty or clogged filters can't effectively trap allergens—and worse, they can contribute to mold growth and reduced airflow.
Here's what happens when filters aren't changed regularly:
Your AC has to work harder → Air quality decreases → Allergens recirculate → Mold may develop in the system → Energy costs increase → Equipment lifespan shortens
For optimal allergy relief, change your air filters based on these guidelines:
- Every 30-60 days if you have pets or severe allergies
- Every 60-90 days for average households during peak seasons
- Every 90 days minimum even with light use
If you're allergic to pollen, dust, or pet dander, investing in high-efficiency filters and changing them frequently is one of the simplest ways to improve your indoor air quality and reduce symptoms.
Maintaining Your Home's AC to Reduce Allergens
Routine HVAC maintenance goes beyond comfort—it directly impacts your indoor air quality and health. Professional inspections ensure that components like coils, drain lines, and blowers stay clean and dry, eliminating places where allergens can collect and spread.
Regular AC services should include:
- Cleaning evaporator and condenser coils to prevent mold growth
- Checking drain lines for clogs that create moisture buildup
- Inspecting ductwork for dust accumulation and air leaks
- Testing airflow to ensure proper circulation
- Replacing or cleaning filters
- Evaluating overall system performance
These preventive measures help your system run efficiently while keeping indoor allergens under control.
Professional Air Conditioner Tune-Ups for Allergy Season
Seasonal tune-ups help catch moisture issues, airflow restrictions, and early signs of mold before they become bigger problems. Having your system inspected before peak allergy seasons—especially spring and summer—helps keep indoor air cleaner and your equipment running reliably when you need it most.
An experienced HVAC technician can also recommend upgrades like:
- UV air purifiers that kill mold spores and bacteria
- Whole-home dehumidifiers to reduce humidity year-round
- HEPA filters for maximum allergen capture
- Duct cleaning services to remove accumulated dust and allergens
If you suffer from asthma or severe allergies, these upgrades combined with regular AC maintenance can provide significant relief and improve your quality of life.
Tips for Allergy-Friendly Air Conditioning Use
Using your air conditioning system consistently helps stabilize indoor conditions and protect against allergen buildup.
Follow these best practices to use air conditioning for allergy relief:
- Keep windows and doors closed during high-pollen days and warm weather months
- Run your AC regularly to maintain consistent airflow and humidity control
- Set your thermostat to reduce humidity below 50% for optimal comfort
- Clean vents and registers monthly to prevent dust accumulation
- Vacuum and dust frequently using HEPA-filtered equipment
- Wash bedding weekly in hot water to kill dust mites
- Address water leaks immediately to prevent mold from developing
- Use exhaust fans in kitchens and bathrooms to control moisture
Pairing proper AC use with good housekeeping creates a comprehensive approach to managing conditioning allergies and maintaining a healthier home environment for your family.
Remember: Your air conditioner works best when it's part of an overall strategy that includes cleanliness, humidity control, and regular professional maintenance.
When to Call a Professional for Allergy and AC Issues
Sometimes allergy symptoms persist even when basic steps are in place. That's often a sign that something deeper within the HVAC system needs attention from a qualified professional.
Signs Your Air Conditioning Isn't Helping Your Allergies Enough
Contact an HVAC specialist or allergist if you notice:
- Musty or moldy odors coming from vents when your AC runs
- Visible mold growth near vents, registers, or around your furnace
- Uneven cooling or weak airflow in certain rooms
- Worsening allergy symptoms or asthma flare-ups indoors
- Increased dust on surfaces shortly after cleaning
- Cold-like symptoms that improve when you leave home
- Excessive humidity despite running your air conditioning
- Strange noises from your HVAC system during operation
An experienced HVAC technician can identify airflow issues, moisture problems, mold contamination, or recommend filtration upgrades that help improve comfort and indoor air quality.
At Chapman Heating, we specialize in HVAC services that prioritize your family's health and comfort. Our team can evaluate your current system, recommend effective treatment solutions for indoor allergens, and provide the maintenance needed to keep your air clean year-round.
Don't let allergies control your life at home. Contact us today to schedule a comprehensive AC inspection and discover how professional HVAC care can help you breathe easier in every season.
Ready to improve your indoor air quality? Call Chapman Heating for expert AC maintenance and allergy solutions that work.

